Seeing the Northern Lights in real life is a wonderful and unique experience. And naturally, you might want some great photos to remember it by.
However, given the fact that Auroras are best observed during dark, clear nights, photographing them takes a bit of preparation. And chances are, you’re not a professional photographer either (or else you won’t be reading this post).
Drawing from my own experience and learnings, I’ve put together this beginner-friendly guide on how to take pictures of the Northern Lights. So let’s see how you can capture the magic with your camera!
Disclosure: Some of the links in this post are affiliate links. If you click on them and make a purchase, I may receive a commission at no extra cost to you. Check my full disclaimer here.
Equipment you need to take good photos of the Northern Lights
First of all, to get that perfect shot of the Aurora Borealis without too much trouble, you’ll need to have some specific equipment.
01. A camera that shoots RAW and that you can use in manual mode
Sure, smartphones nowadays have great cameras incorporated, but I still feel that a camera is a better choice sometimes, especially when shooting a natural phenomenon like the Northern Lights.
I would choose a camera like a DSLR or a mirrorless since they usually have bigger sensors which translate into better image quality. They also allow you to shoot in manual mode and change the lenses.
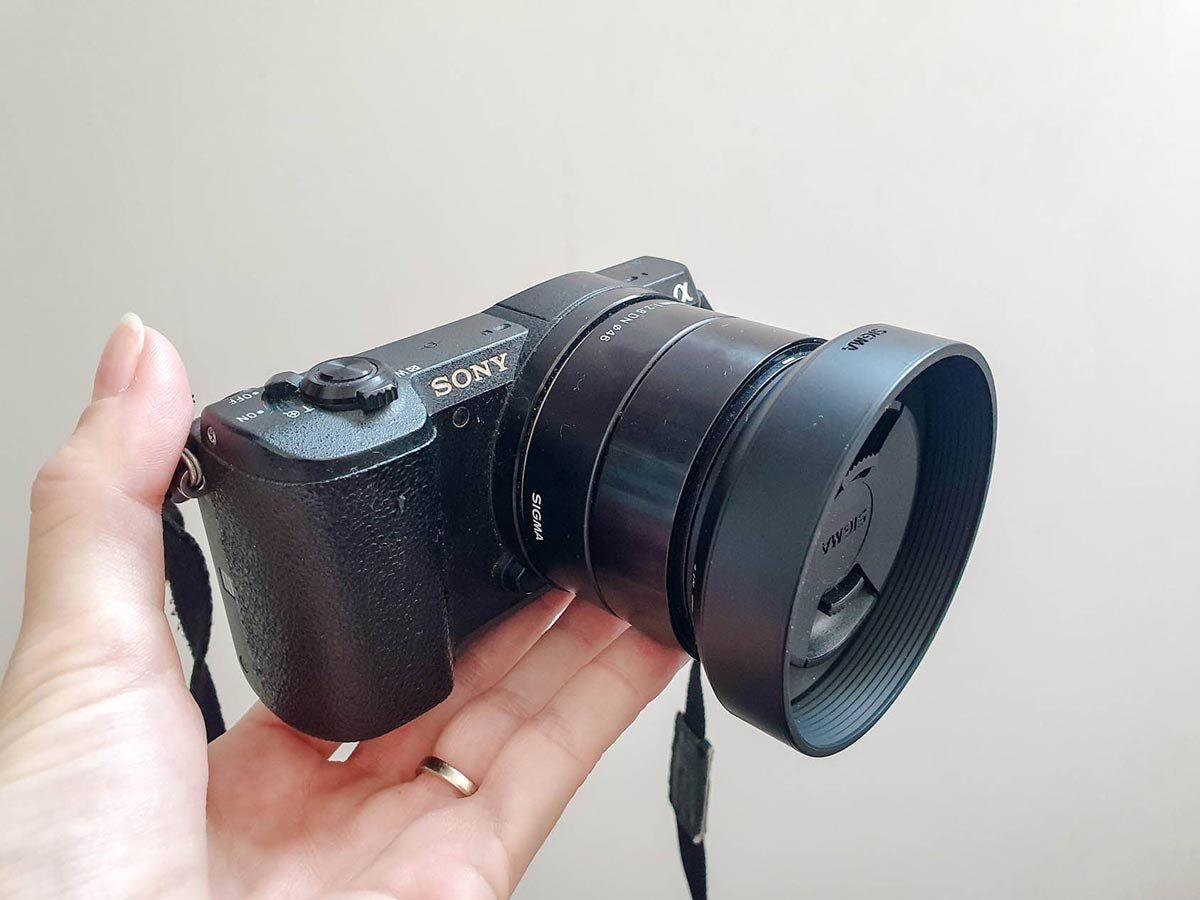
I used a Sony Alpha 5100 (mirrorless) to take pictures of the Aurora Borealis during my trip to the Arctic Circle, back in 2018.
It is a great camera for people wanting to make the transition from classic point-and-shoots or smartphones to a more advanced device.
It does extremely well in auto mode, but it’s also fairly easy to use in manual mode if you want to. And the most wonderful thing about it is that it packs DSLR-like power in a very small and light body.
I honestly loved that camera! And it served me well for 4 years until I upgraded to one of its older brothers: Alpha 6000 (spoiler alert: sometimes I can be a bit of a tech nerd).
In my opinion, the low and mid-range Sony Alphas are really good options if you are searching for an affordable camera for the Northern Lights.
02. Lenses
You know how our pupils contract when there’s too much light around us and dilate when the light conditions are bad?
The first is to let less light enter the eye to not get blinded by it, while the second is to let pass as much light as possible, which will help us distinguish more details in bad lighting.
Well, the pupil of a camera is called the aperture and it is measured in f-stops. To take pictures of the Northern Lights, you’ll need a lens that can capture as much light as possible.
So one with a wider aperture like: f/1.4, f/1.8, f/2. or f/2.8 (F-stops are fractions, so the smaller the number, the wider the aperture).
But the aperture is not the only thing to keep in mind. You’ll also want a wide lens that can capture as much scenery as possible.
For this, you’ll want to pay attention to the lens’ focal length which is measured in mm. The rule is simple: the smaller the millimetric number, the wider the focal length. Many photographers usually recommend a lens at least 24mm wide on a crop sensor or 35mm for a full frame.
My Sony Alpha 5100 came with a 16-50 F/3.5-5.6 pancake lens in the kit, so I opted to get another lens before my trip to the Arctic Circle.
But I didn’t want to spend a lot of money on it (lenses can be pretty expensive), especially since traveling to see the Northern Lights can cost quite a bit and I also had to buy appropriate clothes for the trip, as I didn’t have any.
For these reasons, I decided to get a Sigma 30mm f2.8 DN Art, which had a pretty affordable price. It was the closest I could get to the recommended type of lenses, within a decent budget.
03. Tripod
I cannot stress how important is to have a tripod for nighttime photography!
You might think you can hold your camera steady for those long exposure aurora shots, but I can guarantee you won’t. So save yourself the trouble and bring a tripod with you on your Arctic Circle adventure!
While any tripod will work just fine, I’d recommend buying a sturdier one if you can. It’s even better if it has a hook from where you hang a heavy backpack.
That’s because it can get windy at the North Pole and you wouldn’t want your precious camera to be knocked over in the snow. This is especially riskier with heavier cameras like DSLRs (my fiance actually had this happen with his DSLR).
04. Extra batteries
The cold of the Polar night will discharge your camera battery like crazy! So it’s important to bring extra batteries with you (another reason why you should use a camera and not a phone).
Make sure to keep these extra batteries safely tucked in a pouch or pocket close to your body (your warmth will protect them from the freezing temperatures of the Arctic). And only expose them to the cold when you start using them.
05. Remote control
As I already mentioned, you’ll want to use a tripod to keep your camera steady during long exposures. But the thing is, even when you press the shutter button you can slightly move your camera and mess up the photo.
That’s why you need to bring a remote control. Any type will work, just make sure it is compatible with your camera before you buy it.
06. Extra memory cards (make sure they are fast writing!)
Bringing several memory cards with you is helpful on any trip. But since you’ll shoot the Aurora Borealis in RAW format, it is especially vital to have several memory cards at your disposal. RAW files are huge and you’ll take lots of pictures, trust me.
Another tip is to opt for fast-writing memory cards. You don’t want to have the most beautiful display of the Northern Lights before you and your camera freeze as it writes on the card (happened to me on the first night).
07. A camera bag or backpack
Since you’ll need to bring with you all these accessories, a camera bag or backpack will help you keep them safe and neatly organized. Besides you can hang it on your tripod to further stabilize it if it’s windy outside.
Camera settings for Northern Lights (Easy-to-follow tips)
Photography terminology and settings can be daunting to a beginner. So I’ll try to explain how to take decent pictures of the Northern Lights in simple terms, from one amateur to another.
01. Aperture
This depends on your lens – in night photography: the wider, the better.
A wide aperture will allow for more light to reach the camera sensor. So I would just set it on the lower available setting.
02. Shutter speed
Shutter speed controls the amount of time the shutter of the camera remains open when taking a picture.
A short shutter speed means a short exposure. But as already mentioned, we need to do a long exposure when we shoot the Northern Lights.
That’s because longer shutter speeds allow for more light to pass through the lens. This benefits the photographer when shooting in low light conditions as it helps illuminate the dark scene.
There is a downside though: anything moving in the frame when the camera takes a photo with a long shutter speed will be blurry. That’s why the cars’ stop lights look like light beams when photographing a busy road at night using long exposure.
A good shutter speed when taking photos of a slow or static Aurora is usually around the 15-second mark. If the lights are really faint, you might need to raise it to 20-25 seconds.
You don’t want to raise the shutter speed past the 30-second mark or you’ll end up with star trails and blobs of color since both the stars and the Northern Lights are moving.
Depending on the conditions, you can lower the shutter speed to 5-10 seconds or even less: for example, if there’s a full moon (which means you’ll have more light to work with) or the Aurora Borealis is moving very fast.
03. ISO
Simply put, ISO is a camera setting that will brighten or darken a photo. High ISO translates into brighter images, while with lower ISO it’s the other way around.
However, before you crank your ISO all the way up, you need to know that raising it has a huge consequence: grain (also known as noise). You need to balance your settings to avoid it.
For bright Auroras, an ISO of 400-800 should be fine. Raise it higher as needed, but watch out for noise.
04. Focus
To get crisp photos of the Auroras, you also need to focus on infinity. Here’s how: Make sure to set your focus to manual, since autofocus will do nothing to help you in this case.
To focus to infinity you just need to focus on something very far away, like a distant house, tree, or even a very bright star. You can also set your focus during the day as it’s easier and make a small mark on your lens with some tape or a pen.
05. Shoot in RAW
A RAW file is an image as seen by the camera’s sensor. These files are usually quite big because they contain a lot of data. For this reason, they give a lot more flexibility in post-processing, especially when dealing with dark, under-exposed pictures.
In contrast, when a camera saves photos in JPEG format, it processes and compresses the raw file. Further post-editing can be limited.
You will want to set your camera to shoot in RAW when you photograph the Aurora to have complete control of the processing and lots of data to work with.
My camera settings
I put my camera on Manual mode, set it to save the pictures as RAW+Jpeg (meaning I got 2 files: a raw and a jpeg version of the image I took), and set the aperture on the lowest setting (2.8 for my lens). I focused on infinity using the brightest star in the sky as a reference.
I then played with the shutter speed and the ISO. Since I feared noise, I tried to keep my ISO way under 1500. I often used the 400 or 800 settings, since the display was also pretty strong. To compensate for the ISO, I increased the shutter speed, keeping it between 15 and 30 sec.
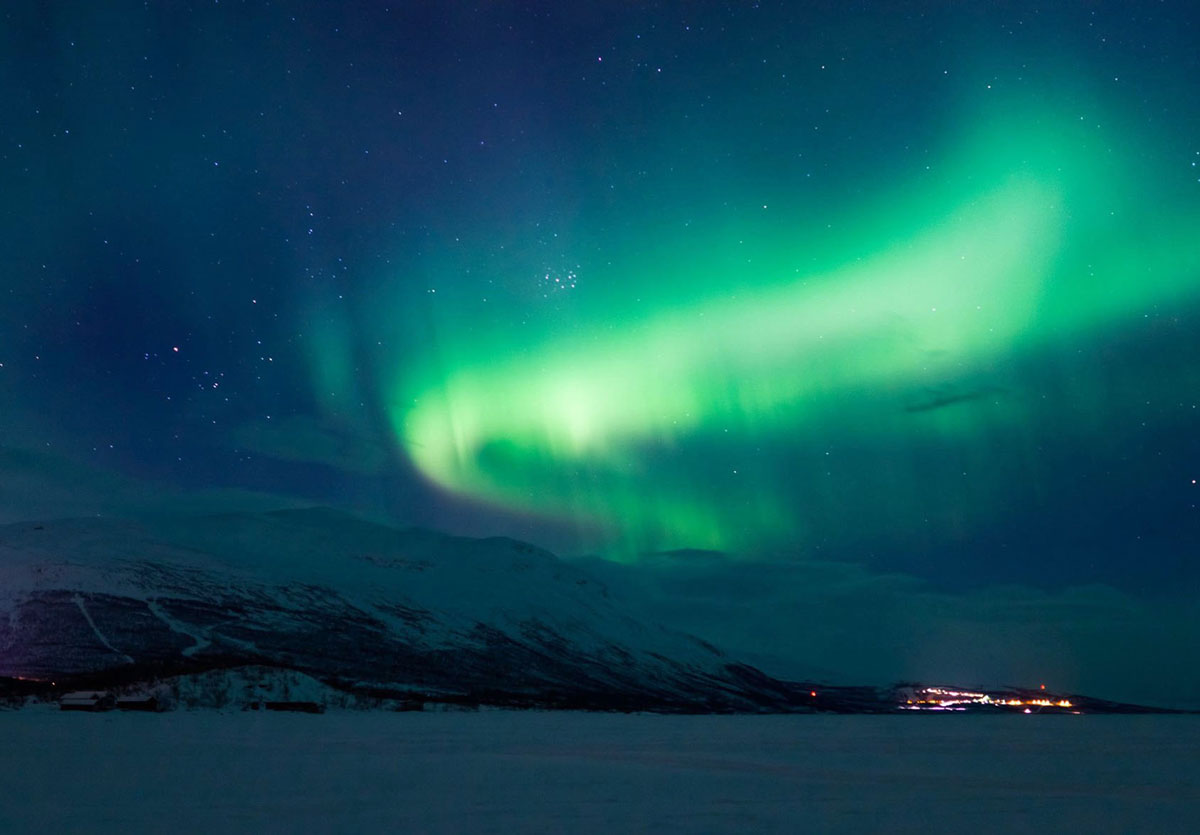
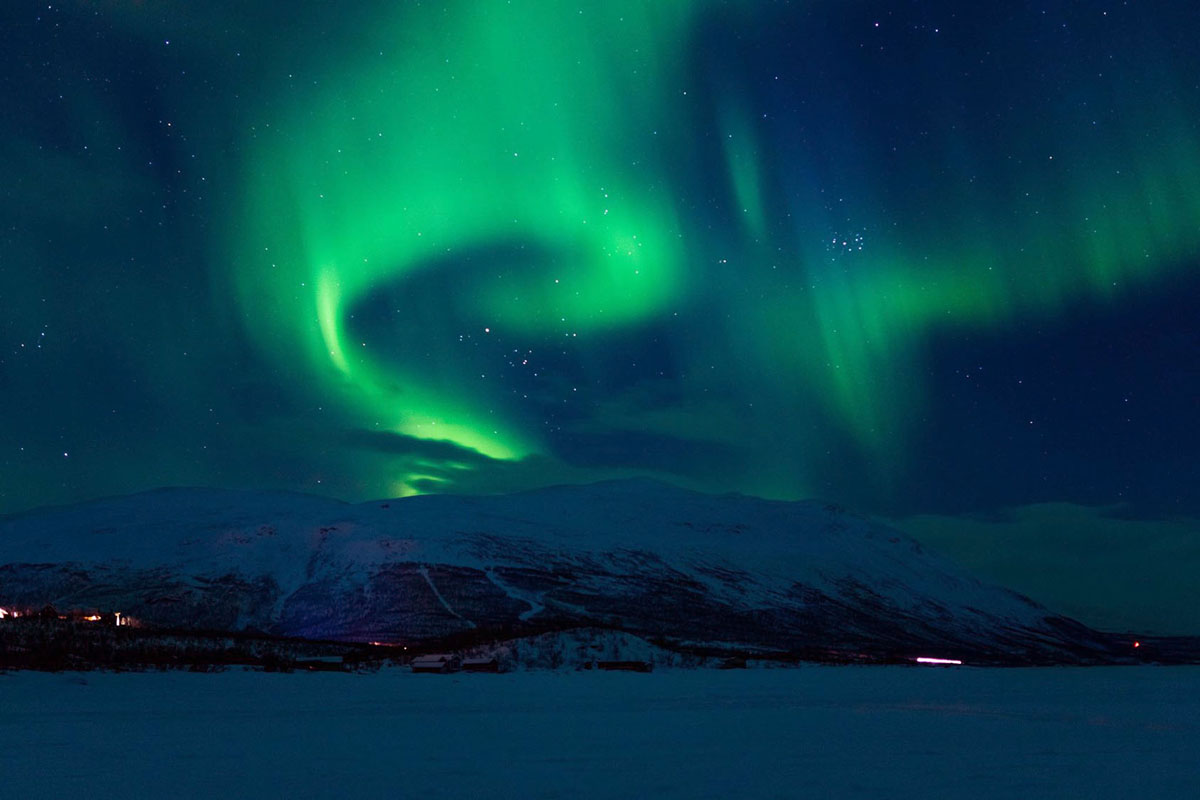
Composition when shooting the Aurora Borealis
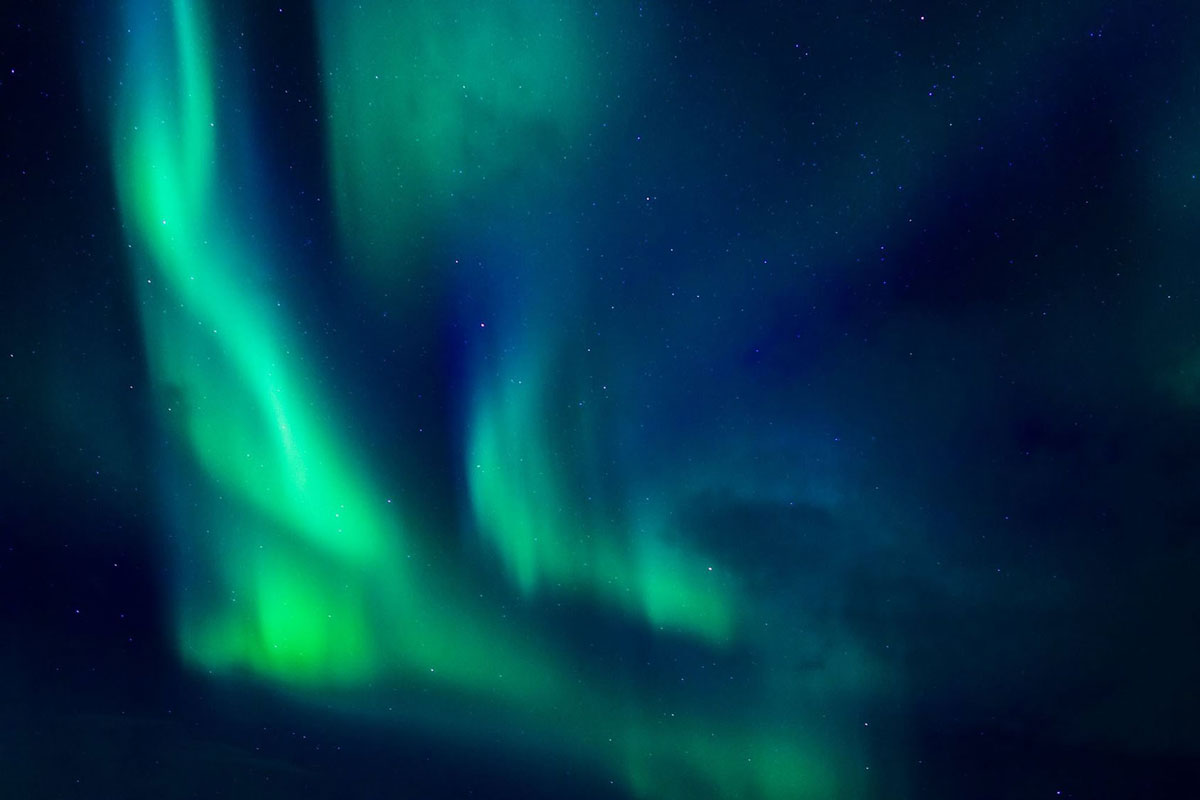
The first 2 nights when I photographed the Aurora, I didn’t think one bit about composition and just shot the sky (in my defense, during the 2nd night even though the display was strong, it was also snowing so the lights were only visible through ‘holes’ in the sky).
But when I browsed through the pictures afterward, I felt that they came out kind of boring.
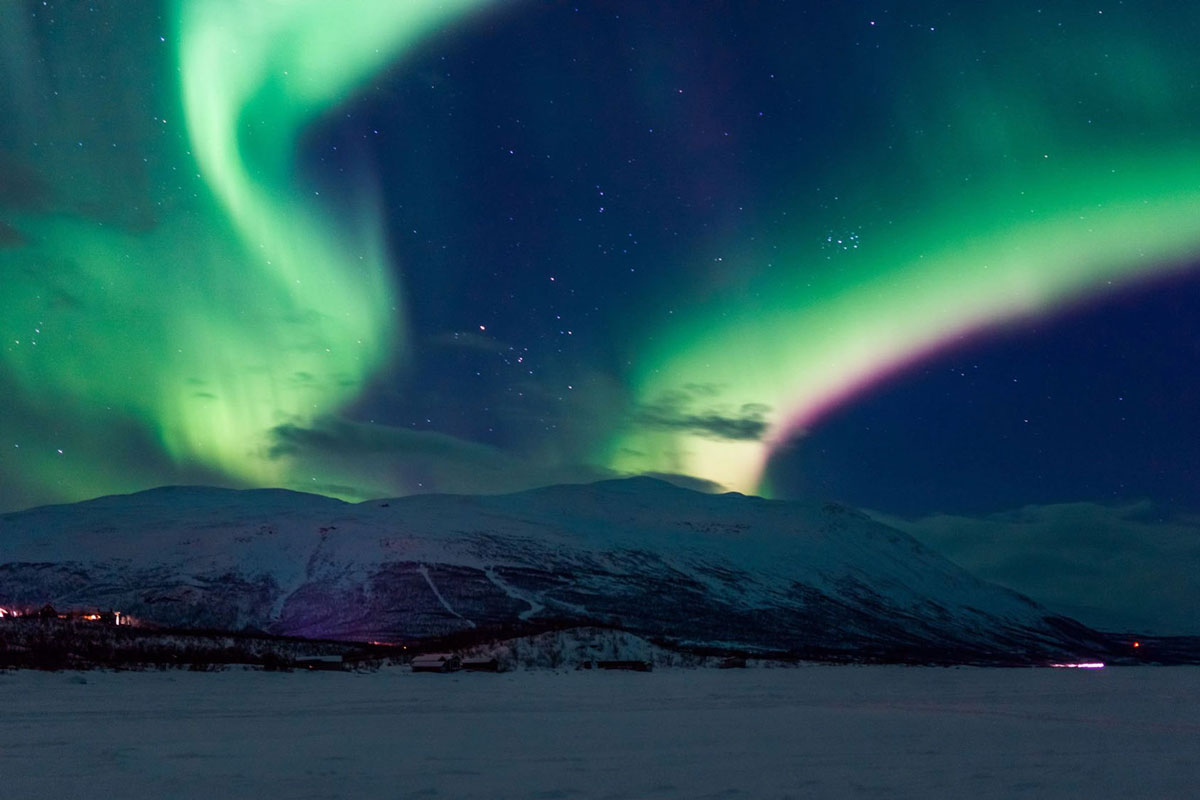
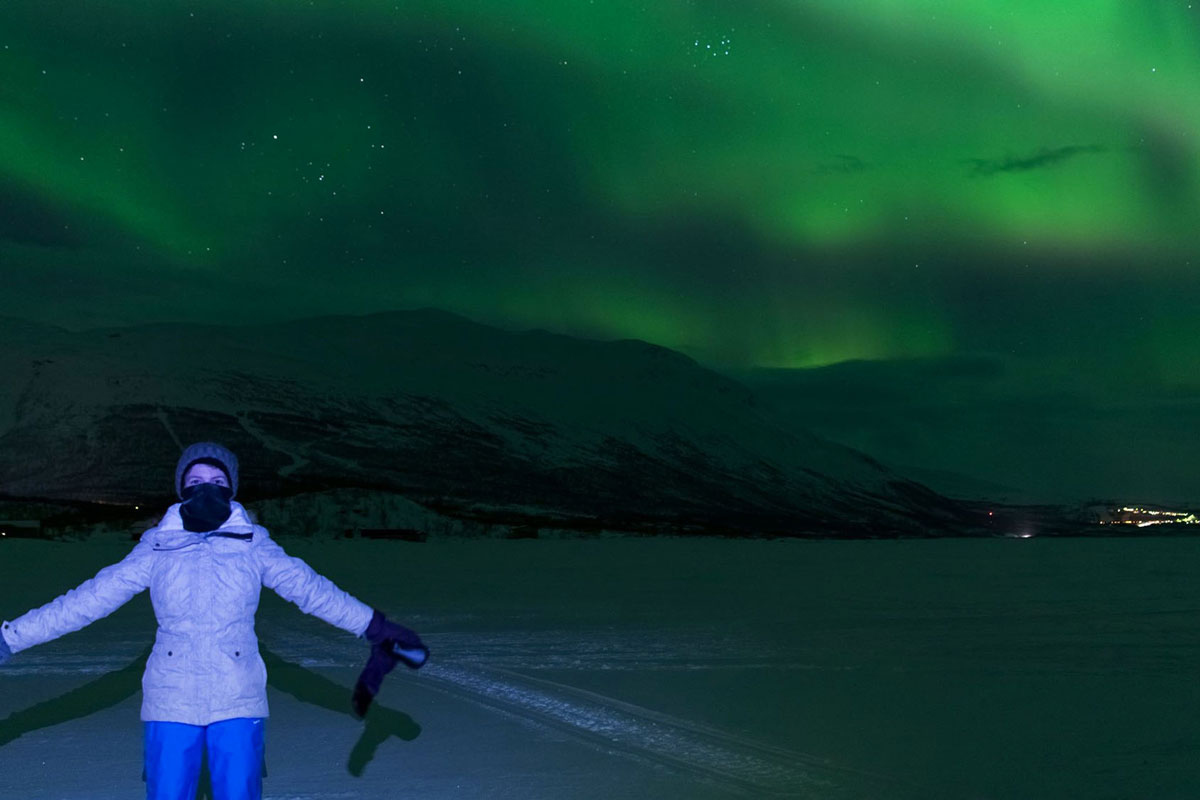
On the 3rd night, I tried to be a bit more mindful and incorporated the mountains surrounding Tornetrask Lake (Abisko Sweden) into my pictures. And I loved the result way more!
vs.
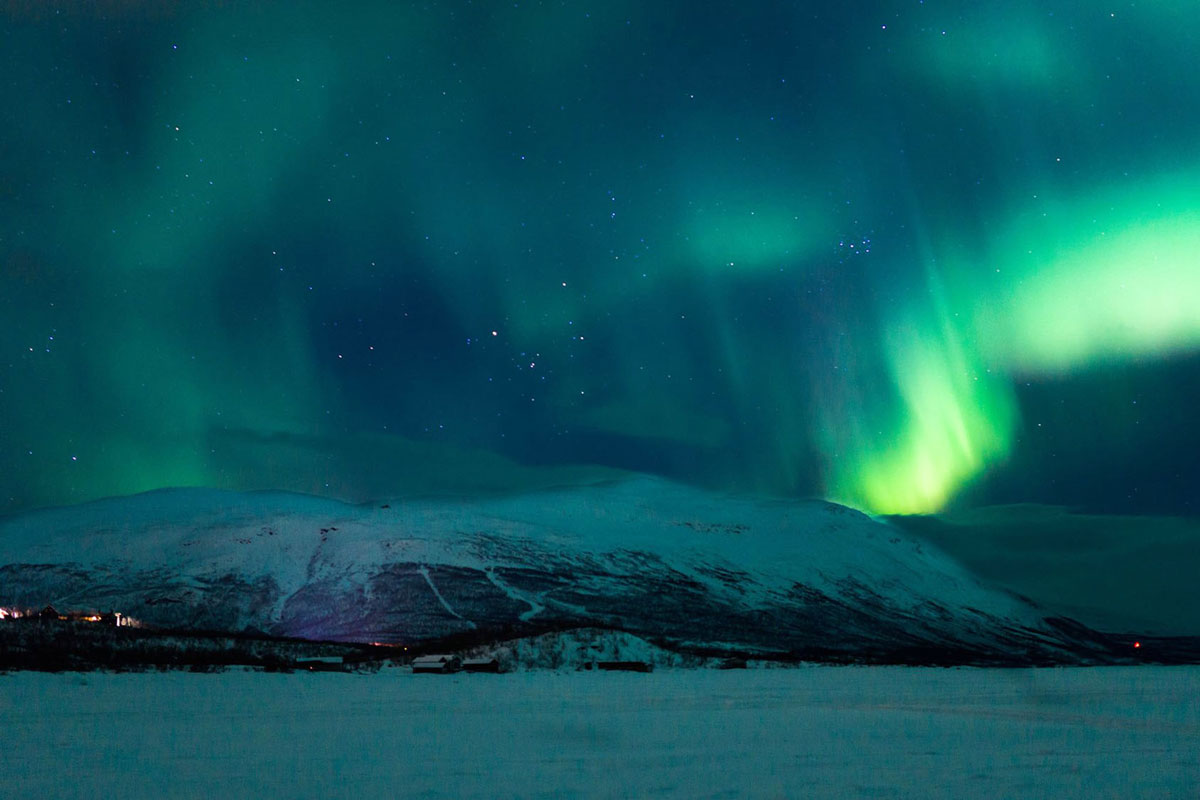
So try to add elements like mountains, trees, a teepee tent, a sleigh, etc to your pictures. It will make them a lot more interesting, in my opinion.
How to take pictures in front of or with the Northern Lights
There are 2 ways you can take photos with the Aurora Borealis:
- Keep your camera settings as they were when you were photographing the lights. Make sure to position yourself further away from the camera (the focus is set to infinity, remember?). Sit as still as possible for the duration of the shot, since any movement will produce blur (because of the long exposure). TIP: Try turning your back to the camera, since the pose works very well with this method of taking a photo with the Northern Lights.
- You will need the help of a second person for this version: switch the focus on yourself and sit very still. As the camera is taking the picture, have someone flash a bright light on you for a split second (I used the flash of my phone). This is enough to illuminate you, but the Aurora will still be visible behind.
Can you take pictures of the Northern Lights with a phone?
You can, but chances are they won’t be the best quality. Even phones with great cameras won’t produce the same results as a mirrorless or a DSLR on a tripod.
However, if you’re confident in your phone’s capabilities and you’re not looking to invest any further into photography gear, here are some tips to maximize your chances of taking good pictures of the Aurora Borealis:
- put the phone on a tripod
- use the timer function to not actually touch it when snapping the photo
- if the phone has a pro/manual mode, use it to set the camera as outlined in this post
- set it to shoot in RAW format (if you have this feature)
This being said I was impressed by my Samsung S23’s camera and software as we spotted the Aurora when we departed from Iceland this year.
Right off the bat, I will mention that this was not an Aurora trip: I mean I had a small hope for seeing it again as anyone would, but I knew conditions were not great, although we are approaching the maximum for the current solar cycle.
I mean it was August so a lot of light still at night and we were in Iceland, which in my opinion is not the ideal place for Aurora chasing in Europe, unless you’re staying for a longer time or.. you’re lucky!
Iceland is famous for its unpredictable weather and while most days were sunny during our trip – it only rained when we went to the spas so it didn’t matter, the nights were either cloudy or the Aurora was too weak for us to be willing to lose sleep for (we had a packed itinerary so we were tired during the evenings).
However, during the night of our departure, there was a solar storm (KP 5-6) so I got hopeful that Aurora might waive us goodbye as our flight was scheduled around 12 AM. And that’s exactly what happened!
Honestly, we were lucky to be flying out that night, because on the ground there was no chance of spotting the Aurora no matter how strong it was: it was super cloudy and windy which I was really anxious about as I hate turbulence.
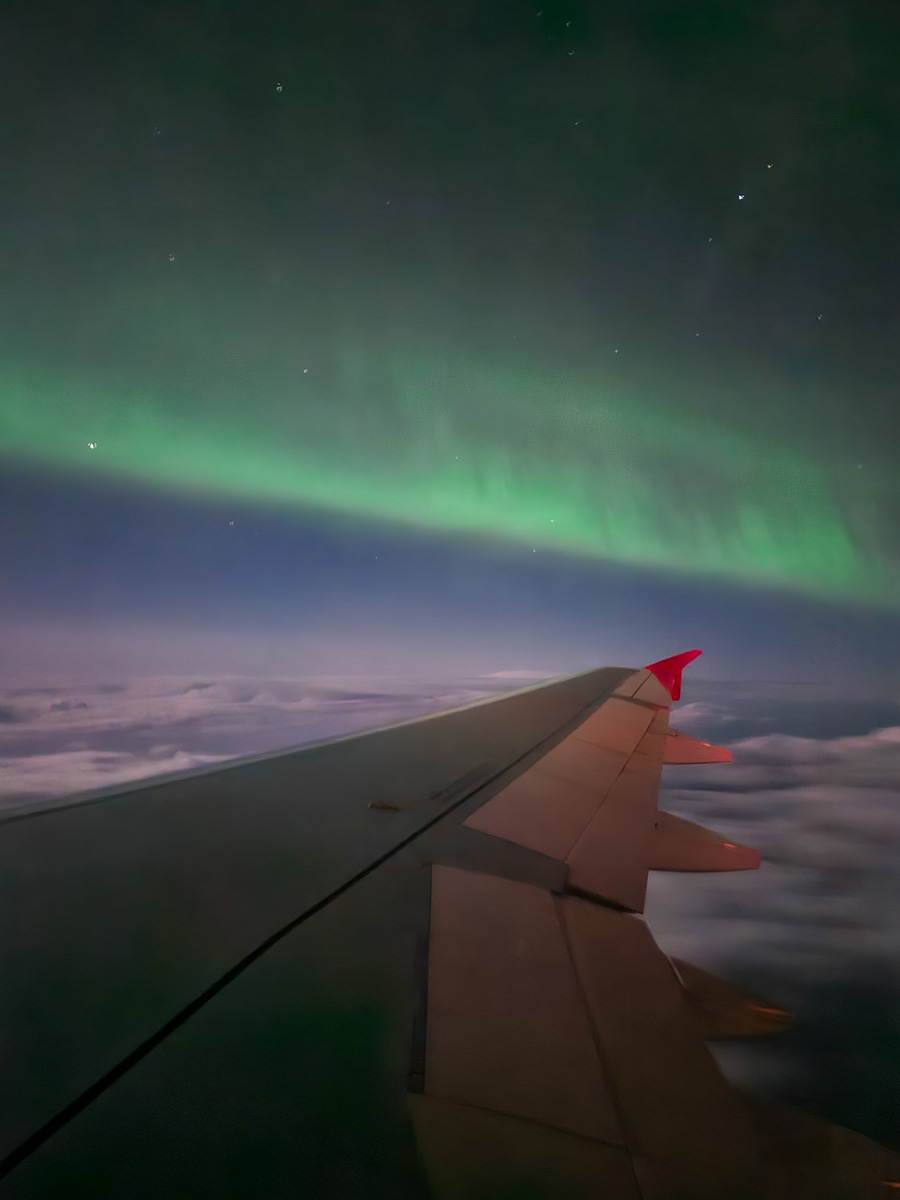
Here is one of the best shots that my phone managed to produce during the lift-off, when thankfully the lights on the plane were still off. I have to admit I was impressed with it: I mean it was on auto mode, handheld and on a moving plane. I wasn’t really expecting it to produce more than a grainy green blob!
So while I’d still recommend using an actual camera when photographing the Northern Lights, if you have a capable phone you might be able to get a decent or even good result with it too.
Final thoughts
So there you have it: my beginner guide on how to take pictures of the Northern Lights. Hope you found it helpful and easy to understand.
So you see, you don’t have to be a professional photographer to get a nice photo of the Aurora. You just need to learn a few simple concepts and have the right equipment.
Of course, if you don’t want to invest in so much gear, you can also book an Aurora photography tour: they’ll provide you with a decent camera and everything else you might need. You just have to bring a few memory cards.
However, I do think that a small mirrorless camera might be handy for any other trips you might do in the future.
Happy travels~
YOU MIGHT ALSO LIKE